How to Take Better Train Travel Photos
For an Internet Rail Travelogue, and for Personal Use.
By Carl Morrison at MoKnowsPhotos.com
- Carl@TrainWeb.com - TrainWeb.org/Carl(The photo examples are best viewed while online, since some references are to photos on other web pages of mine.)
Click any photo to see a double-sized copy, click BACK in your browser to return to this page.
17. Post-Production
Editing
After you've taken
your train photos,
there is still a very enjoyable step to insure the best possible
photos, and that is post-production editing. This includes
cropping (Mentioned in #5 above), straightening, adjusting fill-,
shadow-, and high-lighting.
This step takes place (for me) at the end of the day of shooting, usually in my comfortable hotel room. The first step is downloading the images from the memory card to a laptop (on the road) or desktop computer, and immediately uploading a copy to my web-based online hard drive (iDisk), if I have Internet access at the time.
I use the editing software to download the images either directly from the camera or use a memory card reader. I perfer using the memory card reader so I do not have to use my camera's battery to accomplish the download.
My preferred download and editing software on the PC is Picasa (free at picasa.com), and on the Mac, iPhoto (part of the iLife for $79). There are features of each program that are not as well developed as the other so I use a flash disk to quickly move images from one software to the other until I've corrected all the faults I need to correct.
PhotoShop is my photo editing choice for high resolution printouts, $649.
To let others see you photos, the best way is to have your own website, mine is: MoKnowsPhotos.com check it out.
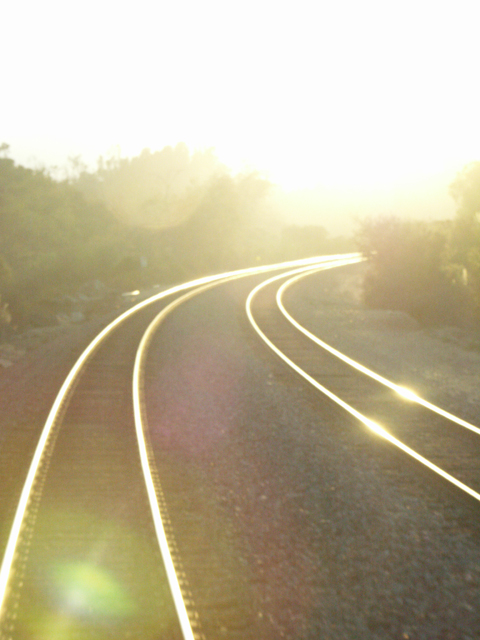
The following
original shot, on the left, was taken from the Pacific Sands' open vestibule at
the end of the train speeding north from San Diego at sunset. It
looks like something you'd never
use, right? Well, I needed a leading line example, with the curve
to the right for Photo Tip 14. Leading Lines, above. I liked the
sun flairing on the two rails so much, I decided to use this image over
another one. One point to be made here is, don't delete your
original images...save them as 'originals' then begin editing copies.
The Problems with the original image (below left): Lens flares, movement, lack of contrast, burned out at top of photo, over exposed, and the tracks curve the wrong direction for my needs.
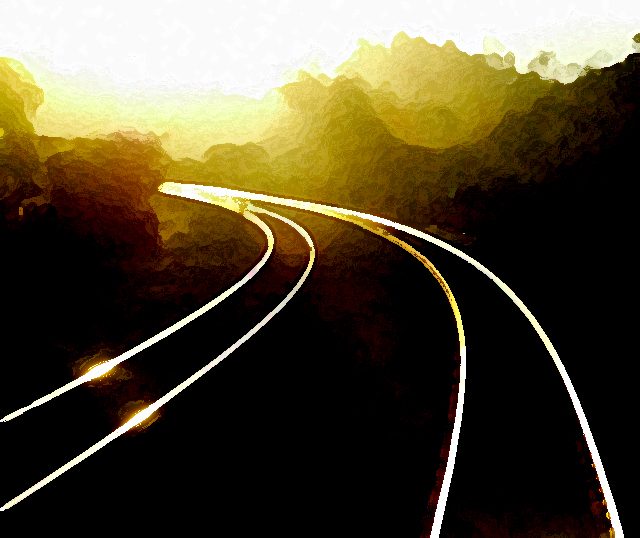
The Solution (thanks to Photoshop Tools):
1. Crop the top down to the trees, the bottom up above the large flare in the bottom corner.
2. Image/Adjustments/Curves and darken the photo enough to hide the lens flare between the double track
3. Horizontally flip the canvas. At this point the movement during the shot was still obvious, so,
4. Add Crosshatch Filter, and 5. Add Drybrush Filter. Did you notice all that manipulation had taken place when you saw this picture in #14 above?
The Problems with the original image (below left): Lens flares, movement, lack of contrast, burned out at top of photo, over exposed, and the tracks curve the wrong direction for my needs.
The Solution (thanks to Photoshop Tools):
1. Crop the top down to the trees, the bottom up above the large flare in the bottom corner.
2. Image/Adjustments/Curves and darken the photo enough to hide the lens flare between the double track
3. Horizontally flip the canvas. At this point the movement during the shot was still obvious, so,
4. Add Crosshatch Filter, and 5. Add Drybrush Filter. Did you notice all that manipulation had taken place when you saw this picture in #14 above?
 17.1 |
 17.2 |
Examples of images manipulated in PhotoShop:
 17.3 |
Links to Concepts by
Number: 1
| 2 | 3 | 4 | 5 | 6 | 7 | 8 | 9 | 10 | 11 | 12 | 13 | 14 | 15 | 16 | 17 | 18 | 19 | 20 | Links Page