How to Take Better Train Travel Photos
For an Internet Rail Travelogue, and for Personal Use.
By Carl Morrison at MoKnowsPhotos.com
- Carl@TrainWeb.com - TrainWeb.org/Carl(The photo examples are best viewed while online, since some references are to photos on other web pages of mine.)
Click any photo to see a double-sized copy, click BACK in your browser to return to this page.
12. Don't Stop Shooting When the Sun Goes Down, Take Night Shots.
I get more compliments about my night shots than any photos. I suppose it is because most people do not shoot night shots. It takes a little extra effort, like setting up a tripod, or bracing your camera against a light post, but the resulting black background (sky) and bright, colored lights makes a nice photo.
Night Flash Pictures of modern trains like Amtrak and Surfliner locomotives will give you some interesting effects, but not what you'd expect. The reflective tape or paint on these engines will be exposed properly, but the engines will not. The same is true if you shoot night shots with flash that include traffic signs, like stop signs, RR signs, street signs, highway signs, they will be the brightest thing in the picture.
 12.1 The Southwest
Chief, coming into Fullerton, with automatic timed exposure, certainly
shows movement, but is the photo worthy of exhibition? The
headlight and ditch lights' length in the picture show how far the
locomotive travelled while the shutter was open.
|
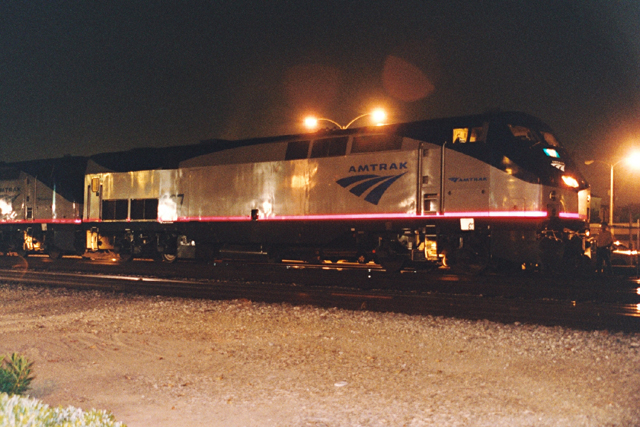 12.2 Use the flash and timed exposure setting,
combined, to fill in the detail beyond the reflective tape.
This setting is used to take a picture of a person near the camera and yet expose the darkened backlight, such as someone standing in fromt of a house decorated with Christmas lights. |
Instead of flash at night, use a tripod, or monopod, or steady your camera against a light post or building when shooting. This will still show movement of the train, with the headlight and ditch lights streaked, but that might be a nice effect. I've seen nice shots where the photographer set up a tripod at night with the red crossing lights and the arm framing the picture and the train streaking through the crossing as a blur.
 12.3 Photo Credit: Don Drummer |
This photo (left) is by my friend, Don Drummer. I was there (until my feet nearly froze waiting for the lights to be set up) with a digital camera that did not have a "B" setting, nor a timed exposure setting. Don, shot this with a 35 mm camera, and I scanned the photo. Obviously a tripod was involved, and many artificial lights. Chris was in the photo line and got this photo as well, at the Ely Steam in Winter Shoot. I use this as an excellent night shot, why is it so impressive? Some credit goes to the black sky and credit also goes to the artificial lighting. |
 12.4 Once the sun
goes down and the lights come on, you will need to steady your camera
or you will have a blurred picture. I often simply hold my camera
firmly against a light post, hold my breath and press the shutter.
|
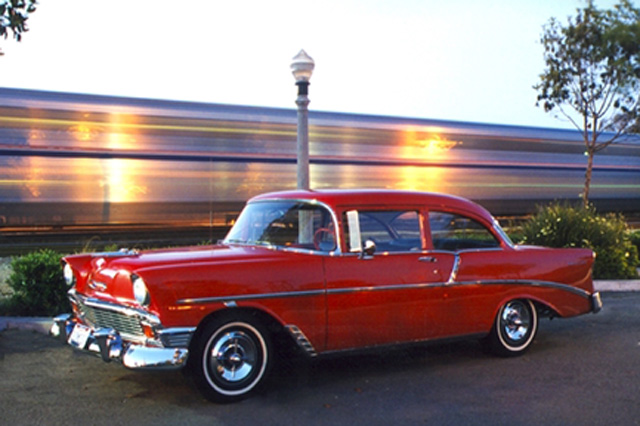 12.5 I wanted to
combine this shot of our '56 Chevy with a train for my
business card, so I
parked on the south side of the Fullerton Station and set up my tripod
(no flash). You will recognize the Southwest Chief, but some
think it is a beach sunset (with 2 suns?). The train was moving
verly slowly, but the 'auto' exposure made it look like it was moving
faster.
|
 12.6 After sunset,
when the sky still holds the blue of dusk, and the lights have come on,
I believe this is the best time of day for photography.
|
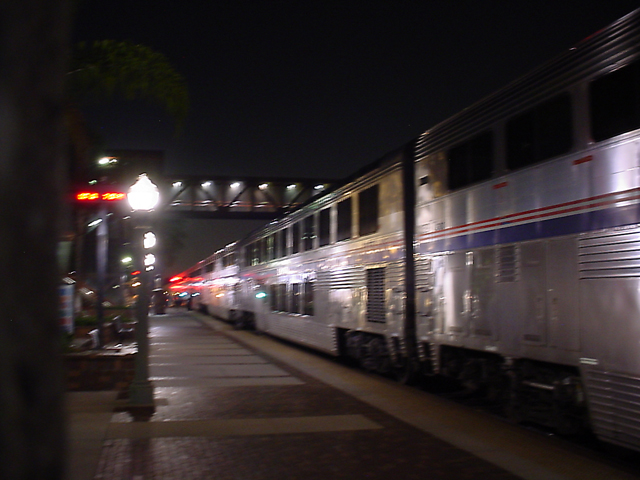 12.7 Combining
several elements (night shot, rule of thirds, leading lines) with wet
pavement from a recent shower makes a nice photo.
|
 12.8 |
 12.9 |
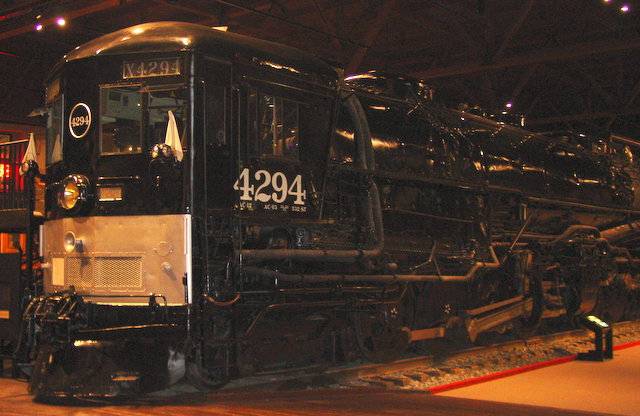
For shots inside
museums, apply the same rules of "no flash and steady your
camera." An added distraction is display lights reflecting in
shiny paint and glass. This can be managed with a rotating
polarizing filter.
 12.10 |
 12.11 For shots
inside
museums, apply the same rules of "no flash and steady your
camera." An
added distraction is display lights reflecting in shiny paint and
glass. This can be managed with a rotating polarizing filter.
|
 12.12 |
Links to Concepts by
Number: 1
| 2 | 3 | 4 | 5 | 6 | 7 | 8 | 9 | 10 | 11 | 12 | 13 | 14 | 15 | 16 | 17 | 18 | 19 | 20 | Links Page